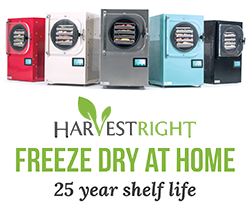
How to Use a Freeze Dryer at Home?
Introduction
Embarking on the journey of freeze drying at home can be both exciting and a bit daunting. But fear not, we are here to guide you through the process, ensuring you can preserve your favorite foods with ease and confidence. Let's dive into the step-by-step guide to using a freeze dryer at home.
Step-by-Step Guide to Using a Freeze Dryer
Using a freeze dryer at home is a straightforward process once you get the hang of it. Here's a step-by-step guide to help you get started:
1. Preparing the Food: Begin by washing and cutting the food into uniform pieces to ensure even drying.
2. Setting Up the Freeze Dryer: Place the food on the trays provided and insert them into the freeze dryer chamber. Set the time and temperature according to the food type.
3. The Freeze Drying Cycle: The freeze dryer will go through several stages, including freezing, primary drying, and secondary drying, to remove moisture from the food.
Tips for Freeze Drying Different Types of Foods
Different foods require different approaches when it comes to freeze drying. Here are some tips to keep in mind:
1. Fruits and Vegetables: For best results, slice them uniformly and spread them out evenly on the trays.
2. Meats: Cook meats thoroughly before freeze drying to prevent bacterial growth. Slice them into even pieces to facilitate faster drying.
3. Dairy Products: Dairy products like yogurt can be freeze dried in dollops or spread thinly on the trays for a crunchy snack.
Conclusion
Using a freeze dryer at home is a rewarding experience, allowing you to preserve a wide variety of foods for long-term storage. With a little practice, you'll become a pro in no time, enjoying the many benefits of home freeze drying.
